

Are you ready to create a unique finish for your pottery that stands out from the rest? A wood ash glaze might be exactly what you need.
This natural and simple recipe can transform your ceramic pieces with beautiful, earthy textures and colors. You’ll discover an easy-to-follow wood ash glaze recipe that you can try at home. Whether you’re new to glazing or looking for something fresh to add to your craft, this guide will give you the confidence to make your own wood ash glaze and bring your creations to life.
Keep reading, and let’s get started!
Benefits Of Wood Ash Glaze
Wood ash glaze offers many benefits for pottery and crafts. It combines tradition with nature in a simple, effective way. This glaze is prized for its natural origin and unique finish. It adds character and beauty to any ceramic piece.
Natural Ingredients
Wood ash glaze uses simple, natural ingredients. Wood ash comes from burned hardwood or softwood. It contains minerals that create beautiful glaze effects. No synthetic chemicals are needed. This keeps the process clean and natural. Potters appreciate the organic feel it brings.
Eco-friendly Approach
Using wood ash glaze supports the environment. It recycles leftover ash from wood fires. This reduces waste and makes use of natural resources. The glaze does not pollute or harm the earth. It fits well with sustainable pottery practices. Crafts made this way have a smaller carbon footprint.
Unique Aesthetic Appeal
Wood ash glaze creates textures and colors you cannot copy. Each batch looks different, giving your work a one-of-a-kind style. The glaze can be smooth, rough, glossy, or matte. Natural variations make every piece special and interesting. Artists enjoy the surprise in each firing.
Materials Needed
Creating a wood ash glaze requires a few key materials. These materials affect the glaze’s texture and color. Gathering the right items ensures a smooth process and a beautiful finish.
Selecting The Right Wood
Choose hardwoods like oak, maple, or cherry. These woods produce ash with good melting properties. Avoid softwoods such as pine or fir. Softwoods contain resin that can spoil the glaze. Use only dry, well-seasoned wood for clean ash.
Gathering Ash
Collect ash from a clean wood fire. Avoid ashes mixed with charcoal or trash. Use a metal container to gather the ash. Let the ash cool completely before handling. Fine, powdery ash works best for glazing.
Additional Supplies
Prepare some basic tools and materials. You will need water for mixing the ash. A fine sieve helps remove large particles. A container or bucket is necessary for mixing. Gloves protect your hands during preparation.
Preparing Wood Ash
Preparing wood ash is a key step in making a good wood ash glaze. Clean ash helps create a smooth, even glaze surface. It is important to remove dirt, stones, and other bits from the ash. Proper preparation improves the glaze’s look and performance.
Cleaning And Sieving
Start by spreading the wood ash on a clean surface. Use a fine sieve to sift the ash. This removes large particles and keeps only the fine ash. Sieving makes the ash easier to mix with other glaze ingredients. It helps the glaze melt evenly in the kiln.
Removing Impurities
Impurities like charcoal, bark, or small stones can spoil the glaze. Pick out these pieces by hand or use a magnet for metal bits. Make sure the ash is dry before cleaning. Clean ash gives a smoother finish and better results.
Storage Tips
Store wood ash in a dry, airtight container. Moisture can cause clumps and spoil the ash. Label the container with the date and type of wood ash. Keep the ash away from strong smells or chemicals. Proper storage keeps the ash fresh and ready to use.
Basic Wood Ash Glaze Recipe
The basic wood ash glaze recipe offers a natural and unique finish for pottery. It uses simple ingredients and is easy to prepare. This glaze gives your ceramics a rustic, earthy look. The process is straightforward and rewarding.
Measuring Ingredients
Start by measuring 100 grams of wood ash. Add 200 grams of clay to balance the mix. Use 300 ml of water to create the glaze base. Accurate measurements ensure consistent results.
Mixing Techniques
Combine wood ash and clay in a large container. Pour water slowly while stirring gently. Use a wooden stick or whisk for even mixing. Keep stirring until the mixture is smooth and lump-free.
Consistency Check
The glaze should have the thickness of heavy cream. It should coat a spoon evenly without dripping fast. Add more water if too thick. Add more clay if too runny. Proper consistency helps the glaze stick well.
Applying The Glaze
Applying wood ash glaze is an important step in pottery. It gives your piece a unique, natural finish. Proper application helps the glaze stick well and look beautiful after firing. Follow simple steps to get the best results.
Surface Preparation
Clean the pottery surface thoroughly. Remove dust, dirt, and oils with a damp cloth. Let the piece dry completely before applying glaze. Smooth surfaces hold the glaze better. Rough surfaces may cause uneven glazing.
Brushing And Dipping
Use a soft brush to apply glaze evenly. Brush gently in one direction for smooth coverage. For dipping, stir the glaze well. Dip the pottery slowly and fully. Lift it out carefully to avoid drips.
Drying And Handling
Let the glaze dry in a dust-free place. Avoid touching the glaze while wet. Drying usually takes a few hours. Handle pieces with care to prevent damage. Proper drying ensures a strong glaze finish.

Credit: potsandpaint.blogspot.com
Firing Process
The firing process is key to creating a beautiful wood ash glaze. It changes the glaze from raw materials to a glass-like surface on pottery. Controlled heat and timing bring out the best texture and color in the glaze. Each step needs careful attention to get the right finish.
Kiln Temperature Settings
Start by setting the kiln temperature correctly. Wood ash glazes usually work well at high temperatures. Aim for about 1200°C to 1300°C (2192°F to 2372°F). This heat melts the ash and clay together. Avoid lower temperatures, as they may not melt the glaze fully. Too high, and the glaze can run off the pottery.
Firing Duration
The firing time depends on the size of the kiln and pottery. Typically, it lasts between 8 and 12 hours. This gives the glaze enough time to mature and bond with the clay. Slow and steady heating helps prevent cracks and bubbles. Keep the temperature steady to get an even glaze surface.
Cooling Down
Cooling is as important as heating. Let the kiln cool down slowly after firing. Rapid cooling can cause cracks in the glaze or pottery. Open the kiln only when it reaches about 200°C (392°F). This slow cooling solidifies the glaze and enhances its shine. Patience here results in a stronger, more beautiful finish.
Troubleshooting Common Issues
Troubleshooting common issues in wood ash glaze helps improve your pottery results. Problems like uneven texture, cracking, and color changes often occur. Understanding these problems allows quick fixes and better glaze quality. This guide focuses on typical issues and how to address them.
Uneven Texture
Uneven texture appears as rough or bumpy spots on the glaze. It happens when the glaze mix is not smooth. Stir the glaze well before use. Avoid adding too much ash at once. Uneven drying or firing can also cause texture problems. Make sure the pottery dries evenly before firing.
Cracking And Peeling
Cracking or peeling means the glaze separates from the pottery surface. This occurs when the glaze and clay expand differently in heat. Check your clay and glaze compatibility. Apply thinner glaze layers to reduce stress. Firing temperature that is too high or low causes cracks. Adjust firing schedule to match glaze needs.
Color Variations
Color changes can make your glaze look uneven or blotchy. Wood ash varies in minerals, affecting glaze color. Use consistent ash source for steady results. Firing temperature and atmosphere also change color. Keep kiln conditions steady for uniform glaze color. Test small batches to find the best formula.
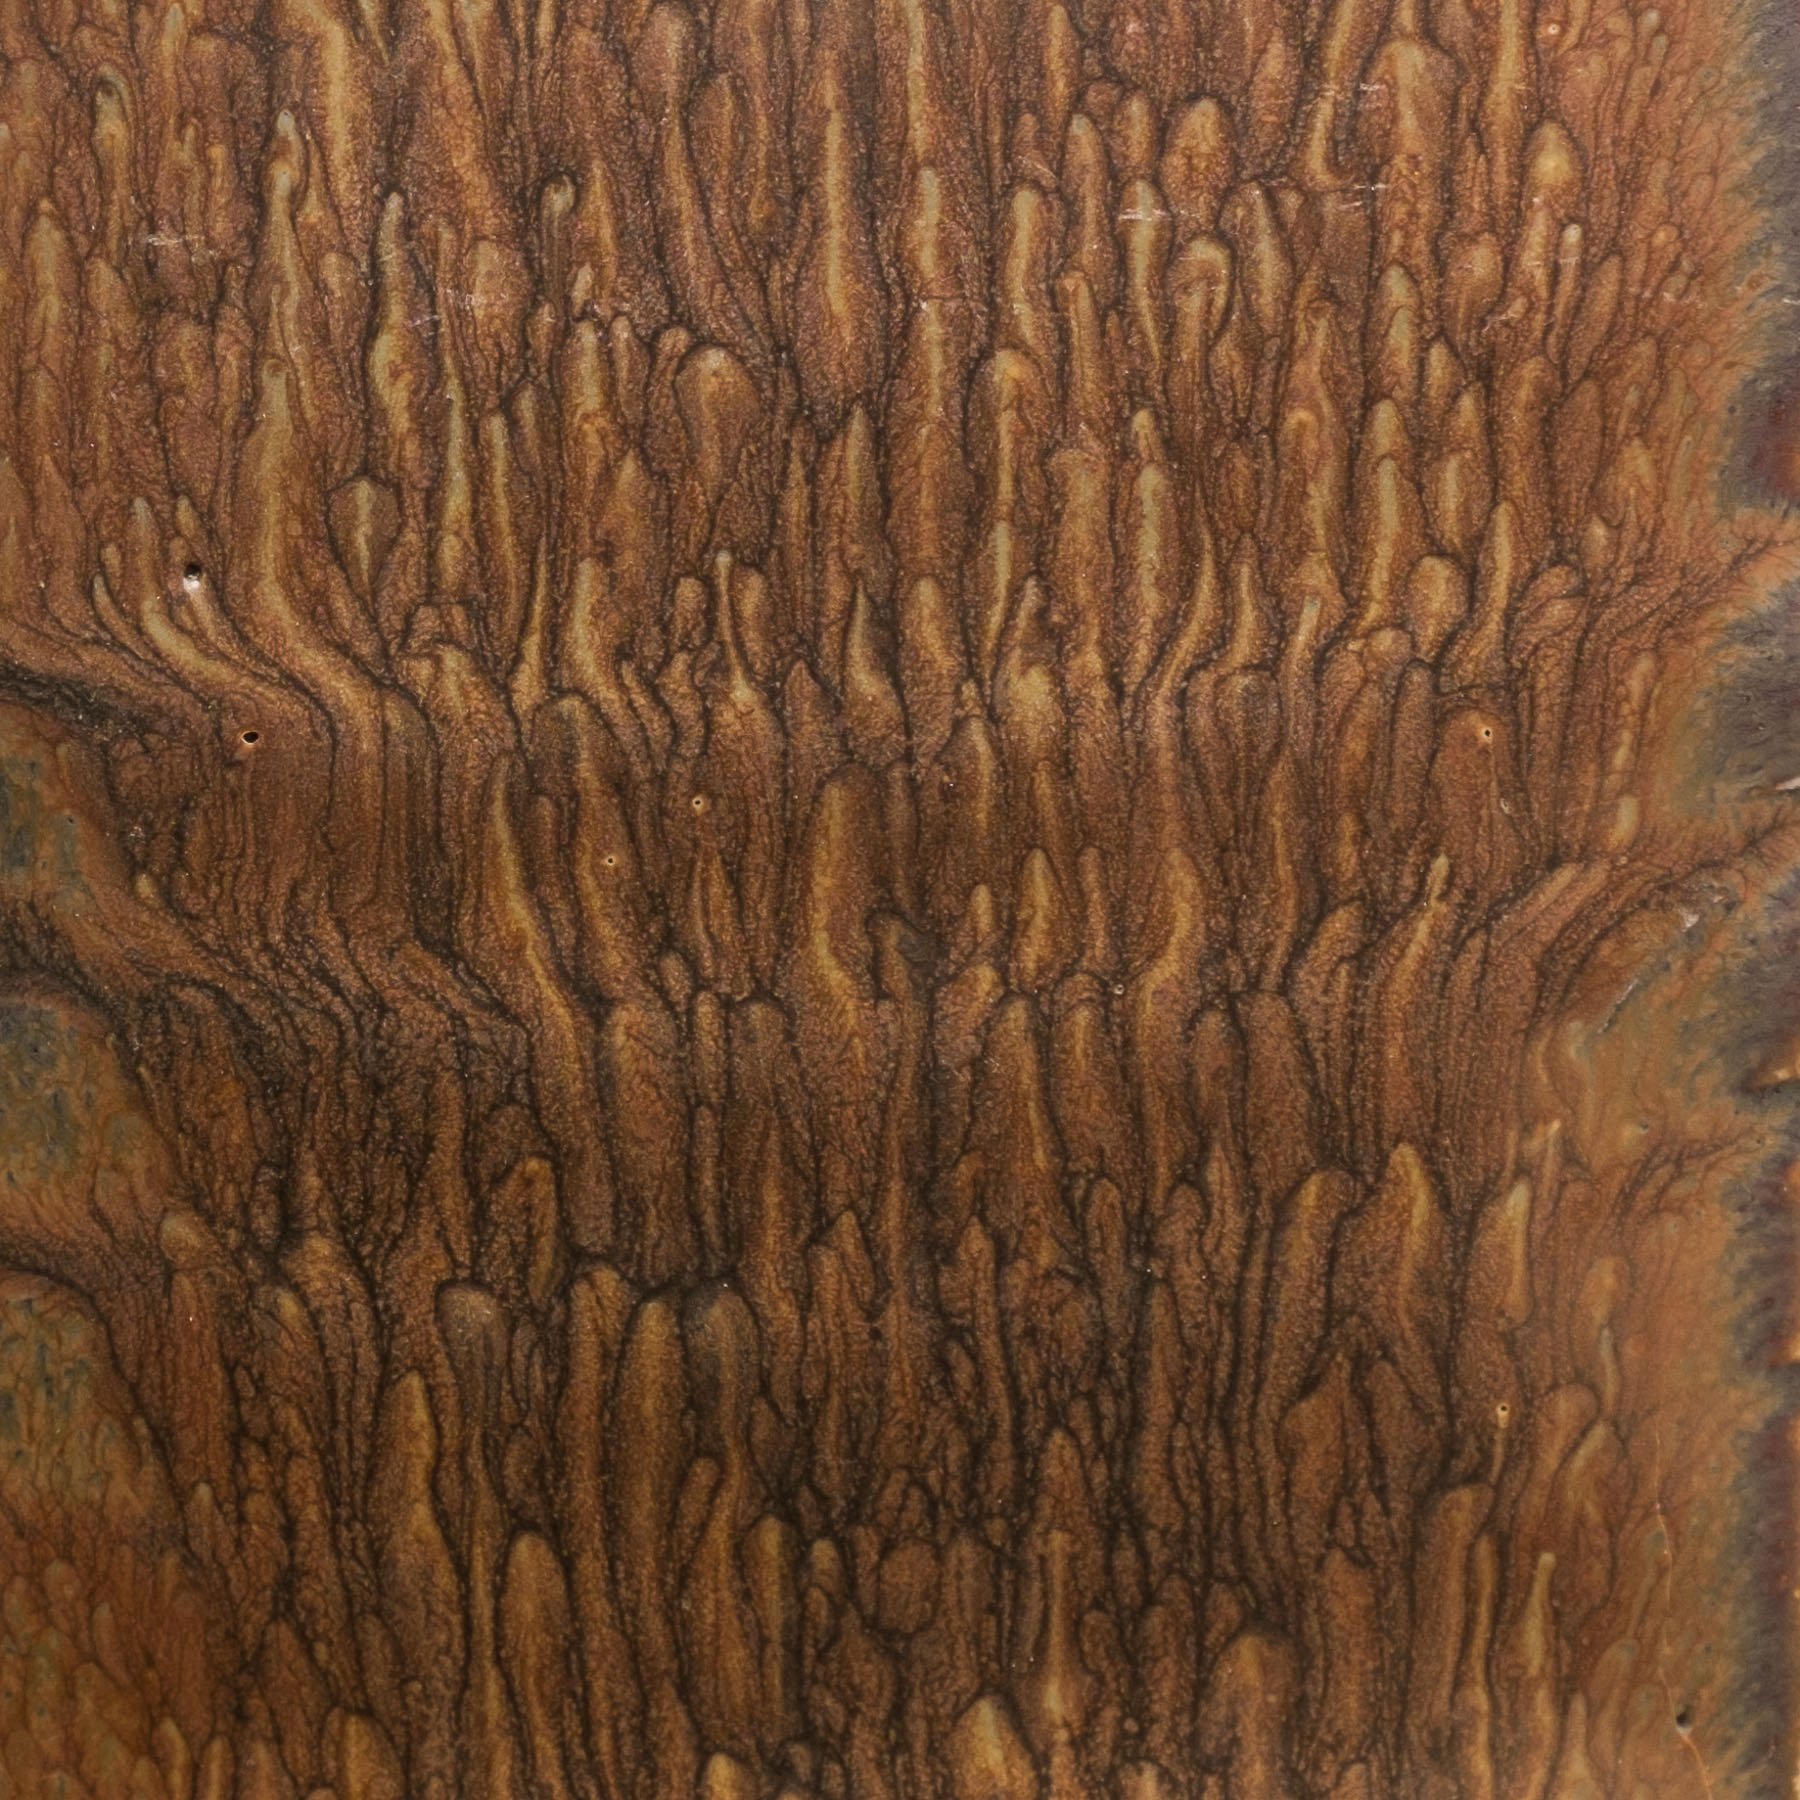
Credit: www.derekau.net
Creative Variations
Wood ash glaze offers a simple base for many creative experiments. By changing ingredients and techniques, you can craft unique finishes. These variations enhance texture, color, and shine. Try different methods to see what suits your style best.
Adding Clay Or Other Materials
Mixing clay into wood ash glaze thickens the texture. It helps the glaze stick better to the pottery. Some potters add sand or grog for rougher surfaces. These materials change how the glaze melts and looks. Small changes create big differences in results.
Experimenting With Wood Types
Wood ash varies depending on the wood burned. Hardwoods often give smoother, lighter ash. Softwoods can create darker, coarser ash. Try ashes from oak, maple, or pine. Each type alters the glaze’s color and texture. Testing different woods makes the glaze more personal.
Layering Techniques
Layering glazes adds depth and interest to pottery. Apply wood ash glaze over other glazes or under it. Let each layer dry before adding the next. This method creates rich, complex surfaces. It also allows mixing colors and textures in one piece.

Credit: digitalfire.com
Frequently Asked Questions
What Is A Wood Ash Glaze Recipe?
A wood ash glaze recipe uses ash from burnt wood as a key ingredient. It creates unique textures and colors on pottery. This natural glaze is eco-friendly and adds a rustic finish to ceramic pieces.
How Do You Prepare Wood Ash For Glazing?
To prepare wood ash, first collect clean, untreated wood ash. Sift out large particles and debris. Mix the fine ash with water and other glaze materials to achieve the desired consistency before application.
What Types Of Pottery Suit Wood Ash Glaze?
Wood ash glaze works best on stoneware and earthenware pottery. These clays can withstand high firing temperatures needed for the glaze to mature. It enhances rustic and natural pottery styles effectively.
Can Wood Ash Glaze Be Used In Electric Kilns?
Yes, wood ash glaze can be used in electric kilns. However, the firing temperature must reach cone 10 (about 1300°C) for proper melting. Adjust kiln schedules to avoid glaze defects.
Conclusion
Wood ash glaze offers a natural, creative finish for pottery. This simple recipe uses common ingredients you can find easily. Experiment with different amounts to get unique textures and colors. Keep your kiln temperature in mind for the best results.
Practice makes your glaze stronger and more beautiful. Try this recipe and enjoy the art of handmade pottery. It adds a special touch to your ceramic work. Give it a shot and see the magic happen.