
Imagine biting into a loaf of bread with a golden, crispy crust and a soft, chewy inside that melts in your mouth. That’s exactly what you get with a wood fired oven bread recipe.
If you’ve ever wanted to bake bread that tastes like it came straight from a rustic bakery, this is your chance. You don’t need fancy ingredients or complicated steps—just a few simple tips and your wood fired oven will do the magic.
Keep reading, and soon you’ll be baking bread that impresses your family, friends, and even yourself. Ready to master the art of wood fired oven bread? Let’s dive in!
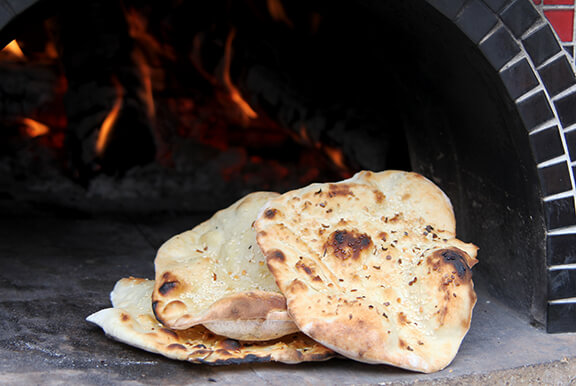
Credit: www.fornobravo.com
Choosing The Right Flour
Choosing the right flour is key for great wood fired oven bread. Flour affects texture, taste, and how the bread rises. Picking the best type helps you bake bread that is soft inside and has a crispy crust.
Types Of Flour For Bread
Different flours give different results. All-purpose flour works for many recipes but may lack strength for bread. Bread flour contains more protein. It helps form gluten, which makes dough elastic and chewy.
Whole wheat flour adds a nutty flavor and denser texture. Rye flour creates a hearty, darker bread. Each type changes the bread’s look and taste.
Benefits Of Whole Grain
Whole grain flour keeps the bran and germ parts of the grain. It has more fiber, vitamins, and minerals than white flour. This makes bread healthier and filling.
Whole grain bread has a richer taste. It also stays fresh longer. The texture is often heavier but very satisfying.
Using Bread Flour
Bread flour is best for wood fired oven bread. It has about 12-14% protein. This higher protein helps the dough rise well and hold its shape.
It creates a chewy crumb and strong crust. Bread flour makes the baking process more reliable and the bread more enjoyable.
Preparing The Dough
Preparing the dough is the first step to making perfect wood fired oven bread. The dough needs the right ingredients and careful handling. This section explains how to prepare the dough with simple steps. Follow these tips to create a soft, stretchy dough that bakes well in a wood fired oven.
Essential Ingredients
Use high-quality flour for the best bread texture. Bread flour or all-purpose flour works well. Water should be clean and cool. Yeast helps the dough rise. Active dry yeast is easy to use. Salt adds flavor and controls yeast activity. Sugar feeds the yeast and improves browning. Olive oil or butter adds softness and taste.
Mixing Techniques
Combine dry ingredients in a large bowl first. Slowly add water while stirring with a spoon. Mix until all flour absorbs water. The dough should be sticky but not too wet. Let it rest for a few minutes. Resting helps the flour absorb water better. Stir again before kneading to bring dough together.
Kneading Tips
Turn the dough onto a clean surface. Push the dough away with the heel of your hand. Fold it back over itself and repeat. Knead for about 10 minutes. The dough becomes smooth and elastic. Avoid adding too much flour while kneading. Use light dusting if dough sticks to the surface. Proper kneading develops gluten for good bread structure.
Fermentation And Proofing
Fermentation and proofing are key steps in making bread in a wood fired oven. These processes help develop flavor, texture, and the bread’s structure. Proper fermentation allows the yeast to work and creates air pockets inside the dough. Proofing is the final rise before baking, which helps the dough become light and fluffy. Understanding these steps improves your bread’s taste and quality.
Ideal Temperature And Time
The best temperature for fermentation is between 75°F and 80°F (24°C to 27°C). Yeast works well in this warm range. Too cold slows the yeast, and too hot can kill it. Fermentation usually takes 1 to 2 hours, but it depends on the dough and environment. Check the dough; it should double in size before moving on.
Bulk Fermentation
Bulk fermentation happens after mixing the dough. This stage lets the yeast create gas and flavor. Keep the dough in a covered bowl to stop drying. Gently fold the dough every 30 minutes to improve texture. The dough will grow and feel airy. This step can take 1 to 3 hours, based on temperature and yeast activity.
Final Proofing Methods
Final proofing is the last rise before baking. Shape the dough and place it in a proofing basket or bowl. Cover it to keep moisture. Proof the dough at room temperature or in a slightly warm place. It usually takes 30 minutes to 1 hour. The dough should look puffy and spring back slowly when touched.

Credit: breadstoneovens.com
Setting Up The Wood Fired Oven
Setting up a wood fired oven correctly is key to baking perfect bread. The oven needs the right wood, proper heating, and the right temperature. These steps ensure your bread bakes evenly and tastes great.
Choosing The Right Wood
Use dry hardwood like oak, maple, or hickory. Hardwood burns longer and gives steady heat. Avoid softwoods like pine. They burn fast and produce more smoke. Make sure the wood is well-seasoned. Wet wood causes smoke and uneven heat.
Heating The Oven Properly
Start by building a small fire in the center. Let the fire grow slowly. Add more wood over time. The oven walls need to heat up fully. This takes about one to two hours. The heat stored in the walls cooks the bread evenly.
Checking Oven Temperature
Use an infrared thermometer or an oven gauge. The baking temperature should be around 450°F (230°C). Test the heat by placing a small piece of flour on the oven floor. If it browns in a few seconds, the oven is ready. Too hot? Let it cool for a while before baking.
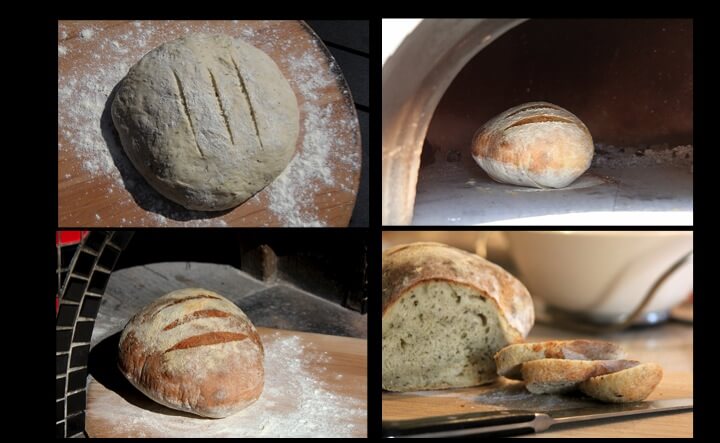
Shaping And Scoring The Loaf
Shaping and scoring the loaf are key steps in baking bread in a wood fired oven. These steps affect the bread’s final look and texture. Proper shaping creates a good structure for the dough. Scoring helps control how the bread expands during baking. Both add a unique touch to your homemade bread.
Shaping Techniques
Start by gently deflating the dough. Use your hands to form it into a tight ball or oval. Keep the surface smooth and even. Tuck the edges under to create tension. This tension helps the loaf rise evenly in the oven. Avoid pressing too hard to keep air bubbles inside.
Scoring Patterns For Crust
Scoring guides the bread’s rise and creates beautiful crust patterns. Make shallow cuts about 1/4 inch deep. Straight slashes let the bread expand tall. Cross or diamond patterns add a classic look. Curved cuts create artistic shapes. Experiment with different patterns to find your favorite.
Tools For Scoring
A sharp blade is essential for clean cuts. Use a bread lame or a small, sharp knife. A razor blade works well too. Keep the blade at a 30 to 45 degree angle. This angle helps make smooth, neat slashes. Replace dull blades often to avoid tearing the dough.
Baking Process
Baking bread in a wood fired oven is a special experience. The process needs care and attention. Each step affects the bread’s taste and texture. Understanding the baking process helps you get perfect bread every time.
Loading Bread Into The Oven
Place the dough carefully on the oven floor. Use a wooden peel to avoid burning your hands. Make sure the oven floor is clean. Space the loaves apart for even cooking. Avoid overcrowding to keep the heat steady.
Managing Heat And Steam
Heat control is crucial in a wood fired oven. The fire should be strong at first, then lower for baking. Steam helps create a crispy crust. Throw a few ice cubes or water drops inside. The steam will keep the bread moist and crunchy.
Baking Time And Indicators
Baking time varies but usually lasts 20 to 40 minutes. Watch the crust color for signs of doneness. It should turn golden brown and firm. Tap the bottom of the bread; it should sound hollow. These are good indicators that the bread is ready.
Achieving The Perfect Crust
Achieving the perfect crust on wood fired oven bread brings a special touch to every bite. The crust should be crispy yet tender inside. It adds flavor and keeps the bread fresh longer.
Wood fired ovens create intense heat and unique smoke, which helps form a beautiful crust. Controlling this heat and moisture is key. Below are tips and tricks to get the crust just right.
Crust Texture And Color
The crust should feel crunchy and crackly. It often has a golden brown to deep amber color. Dark spots show caramelization of sugars in the dough. This gives a rich, slightly sweet taste.
Uneven color means the heat is not spread well. A good crust has a mix of soft and hard areas. This makes every bite interesting.
Tips For Crispy Crust
Use steam in the early baking stage. It keeps the dough surface moist. This delays crust setting and allows better oven spring. Open the oven door briefly after the first 10 minutes. This releases moisture and helps crisp the crust.
Preheat the oven well. High temperature helps form a crust quickly. Use a baking stone or steel to hold heat evenly. Brush the dough with water before baking to improve crust texture.
Common Crust Issues And Fixes
Soft crust means too much moisture or low heat. Increase oven temperature or open the door to let steam out. Pale crust may result from sugar-free dough or low heat. Add a little sugar or raise the temperature slightly.
Burnt crust occurs if the heat is too high or baking too long. Lower the temperature and check the bread early. Sticky crust suggests underbaking. Bake longer or increase heat for a better finish.
Credit: www.fornobravo.com
Cooling And Storing Bread
Cooling and storing bread made in a wood fired oven is very important. It keeps the bread fresh and tasty for longer. Proper cooling stops the bread from becoming soggy inside. Good storage prevents the bread from drying out or going stale.
Cooling Techniques
Take the bread out of the oven carefully. Place it on a wire rack. This lets air flow all around the bread. Do not cover the bread while it cools. Let it cool at room temperature for at least one hour. Avoid placing it in a closed container before it cools.
Storage Tips To Maintain Freshness
Wrap the cooled bread in a clean cloth or paper bag. This keeps the crust crisp and the inside soft. Store bread at room temperature in a dry place. Avoid storing bread in the fridge. It makes bread dry and hard faster. For longer storage, freeze the bread in a plastic bag. Slice it first for easy use later.
Reheating Bread
To enjoy warm bread, reheat it gently. Preheat your oven to 350°F (175°C). Wrap the bread in foil and heat for 10-15 minutes. This keeps the crust crunchy and the inside soft. Avoid microwaving bread as it changes texture quickly.
Frequently Asked Questions
What Makes Wood Fired Oven Bread Unique?
Wood fired oven bread has a distinct smoky flavor and crispy crust. The high heat from the wood fire creates a perfect texture. It also cooks evenly, enhancing the bread’s aroma and taste, unlike conventional ovens.
How Do I Prepare Dough For Wood Fired Ovens?
Use high-quality flour, water, yeast, and salt for the dough. Knead it well and let it rise until doubled. This ensures the dough can withstand the intense heat and produces a soft, airy crumb inside.
What Is The Ideal Temperature For Baking Wood Fired Bread?
The ideal temperature for wood fired bread is between 450°F and 550°F (230°C to 290°C). This high heat quickly forms a crunchy crust while keeping the inside moist and fluffy, delivering the perfect artisan bread experience.
How Long Does Bread Bake In A Wood Fired Oven?
Bread typically bakes in 20 to 30 minutes in a wood fired oven. Baking time depends on the oven temperature and loaf size. Monitor closely to avoid burning and ensure a golden-brown crust with a soft interior.
Conclusion
Baking bread in a wood-fired oven brings a special flavor. The crust turns golden and crunchy. The inside stays soft and warm. This recipe is simple to follow. Anyone can enjoy fresh, tasty bread at home. Just a few ingredients and some patience.
The smell will fill your kitchen with warmth. Share your bread with family or friends. Enjoy the joy of baking every time. Try this recipe and taste the difference yourself.