
If you’re looking for a simple, effective way to boost your fishing success, Walt’s Worm Recipe might be just what you need. This easy-to-make bait has helped countless anglers catch more fish, and it can do the same for you.
Imagine holding a bait that fish can’t resist—something natural, tasty, and designed to attract them right to your hook. Keep reading to discover the secrets behind Walt’s Worm Recipe and how it can transform your fishing experience. Your next big catch could be just a recipe away!
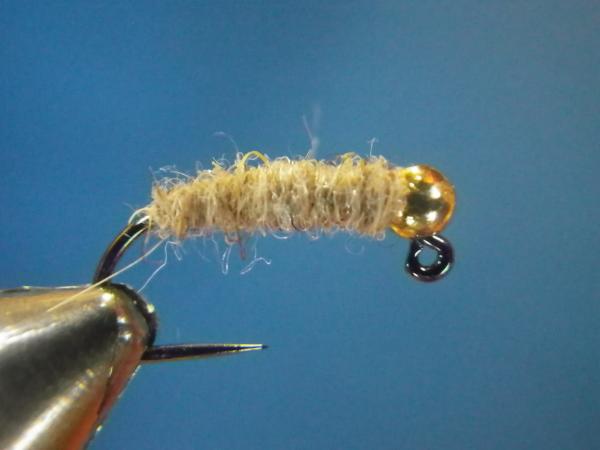
Walt’s Worm Recipe Basics
Walt’s Worm Recipe Basics cover the essential steps to prepare a popular fishing bait. This recipe is simple yet effective. It helps attract more fish by using natural ingredients.
The recipe focuses on combining key ingredients in the right ratios. This balance creates a scent and texture that fish find hard to resist. Preparation is easy with a few tips to get the best results.
Key Ingredients
The main ingredients include worms, cornmeal, and some flour. Worms provide natural scent and movement. Cornmeal adds texture and bulk. Flour binds everything together, making the bait sticky.
Ingredient Ratios
Use two parts cornmeal to one part flour. Add enough worms to make the mix moist. Avoid too much flour or cornmeal. The mixture should be soft but hold its shape on the hook.
Preparation Tips
Mix dry ingredients first for even texture. Gently fold in worms to avoid breaking them. Keep the mixture cool and use it within a day. Store leftovers in a sealed container in the fridge.

Credit: www.flyfishfood.com
Setting Up Your Worm Farm
Setting up your worm farm is the first step in creating rich, natural compost. A well-prepared worm farm helps worms thrive and produce quality castings. This section guides you through choosing the right bin, finding the best spot, and keeping moisture and temperature just right.
Choosing The Right Bin
Pick a bin that is sturdy and has good ventilation. Plastic bins work well because they retain moisture and are easy to clean. Make sure the bin is about 12 inches deep. Drill small holes on the sides and lid for airflow. Avoid metal bins because they can get too hot or cold.
Ideal Location
Place your worm farm in a shaded area. Worms do not like direct sunlight or strong winds. A garage, porch, or under a tree works well. Keep the bin away from extreme heat or cold. The best spot stays between 55 and 77 degrees Fahrenheit.
Maintaining Moisture And Temperature
Worms need a damp but not wet environment. Check the bedding every few days. If it feels dry, spray water lightly. If it’s too wet, add dry shredded paper or cardboard. Keep the temperature steady by moving the bin if it gets too hot or cold. Proper moisture and temperature keep worms active and healthy.
Feeding Schedule And Techniques
Feeding Walt’s Worm Recipe properly is key to healthy, active worms. A good feeding schedule keeps worms happy and productive. Knowing how much and when to feed helps avoid problems.
How Often To Feed
Feed your worms every 2 to 3 days. This timing gives worms time to eat and break down food. Avoid feeding daily, as it may cause waste build-up. Watch your worm bin to see how fast they eat. Adjust feeding frequency based on worm activity and food levels.
Signs Of Overfeeding
Too much food causes bad smells and attracts pests. You might see mold or fruit flies around the bin. Worms may avoid food if there is too much. Uneaten food that stays wet and rots is a clear sign. Reduce feeding amount if you notice these problems.
Best Feeding Practices
Chop food scraps into small pieces before feeding. This helps worms eat faster and prevents large clumps. Mix food with bedding to keep moisture balanced. Avoid feeding meat, dairy, or oily foods. Spread food evenly to stop worms from crowding in one spot.
Credit: www.lwflies.com
Managing Worm Health
Managing worm health is key to a successful Walt’s Worm Recipe. Healthy worms create rich compost and thrive longer. Careful attention keeps worms active and productive. Small problems can grow if ignored early. Regular checks help spot issues fast. Good worm care means good results.
Common Issues
Worms may face problems like dryness or bad smell. Too much moisture causes worms to drown or get sick. Too little moisture makes worms dry out and slow down. Worms can escape if the bin is too hot or too cold. Watch for worms crawling on the surface often. This shows stress or poor conditions.
Pest Control
Pests like ants, mites, and flies can harm worms. They eat worm food or bite worms. Keep the worm bin covered to stop pests. Remove excess food that attracts bugs. Use natural barriers like diatomaceous earth to protect worms. Clean the bin regularly to avoid pest buildup.
Preventing Disease
Disease spreads quickly in crowded or dirty bins. Avoid overfeeding to keep waste fresh and clean. Remove old, moldy food to stop bacteria growth. Keep bedding dry but moist to stop fungi. Separate sick worms to prevent spread. Healthy worms resist disease better and live longer.
Harvesting Worm Castings
Harvesting worm castings is a key step in Walt’s Worm Recipe. These castings are rich, natural fertilizer made by worms. They boost plant growth and soil health. Knowing when and how to harvest castings helps you get the best results. Proper use of castings makes your garden thrive.
When To Harvest
Worm castings are ready after three to six months. The compost should look dark and crumbly. It should smell earthy, not rotten. If worms start to move away, it means the castings are ready. Avoid harvesting too soon to keep nutrients strong.
Harvesting Methods
Separate worms from castings carefully. One way is to push castings to one side of the bin. Add fresh food on the empty side. Worms will move there in a few days. Then, remove the finished castings. Another method is to scoop castings from the top gently. Use a light source to encourage worms to burrow down.
Using Castings Effectively
Mix castings with soil before planting. Use one part castings to three parts soil. Sprinkle castings around plants as mulch. Water after applying to help nutrients soak in. Avoid using castings alone; combine with other soil for best plant health.
Troubleshooting Common Problems
Troubleshooting common problems with Walt’s Worm Recipe helps keep your worm bin healthy. Small issues can stop your worms from growing well. Fixing these problems early saves time and effort. This section guides you through common problems and easy fixes.
Bad Odors
Bad smells mean your worm bin is not balanced. Too much food or wet scraps cause bad odors. Remove extra food and add dry bedding like shredded paper. Turn the bin gently to add air. Keep the bin moist but not wet. Good air flow stops smells fast.
Worms Escaping
Worms leave if conditions are wrong. Check if the bin is too wet or dry. Worms dislike strong smells from too much food. Avoid bright light; worms like dark places. Add fresh bedding and keep the temperature steady. Fix these to keep worms inside.
Slow Worm Growth
Slow growth happens with poor food or bad conditions. Feed worms soft, fresh scraps and avoid meat or dairy. Keep the bin warm, around 55-77°F (13-25°C). Make sure the bedding is clean and moist. Good care helps worms grow faster and stay healthy.
Benefits Of Walt’s Worm Recipe
Walt’s Worm Recipe offers many benefits for gardeners and farmers. It helps worms grow better and faster. The recipe also improves soil health, making plants stronger. It supports eco-friendly farming by reducing waste and chemicals.
Improved Worm Growth
Walt’s Worm Recipe provides the right nutrients for worms. It helps worms grow larger and healthier. Healthy worms work faster to break down organic waste. This leads to more worm castings, which are rich in nutrients.
Enhanced Soil Quality
Using this recipe enriches the soil naturally. Worm castings improve soil texture and water retention. The soil gains more nutrients that plants need. This creates a better environment for roots to grow strong.
Sustainable Farming
The recipe supports eco-friendly farming practices. It reduces the need for chemical fertilizers and pesticides. Using natural worm castings lowers pollution and waste. This helps protect the environment and saves money.

Credit: troutstrike.com
Frequently Asked Questions
What Ingredients Are Used In Walt’s Worm Recipe?
Walt’s Worm Recipe includes basic ingredients like oats, cornmeal, and water. These create an ideal worm food mix that attracts and nourishes worms effectively for bait or composting.
How Does Walt’s Worm Recipe Benefit Worm Farming?
The recipe boosts worm growth and reproduction. It provides a balanced diet rich in nutrients, improving worm health and increasing worm yield for both fishing bait and soil enrichment.
Can Walt’s Worm Recipe Be Used For Composting?
Yes, the recipe enhances compost quality. It feeds worms that break down organic matter faster, resulting in richer, nutrient-dense compost ideal for gardens and plants.
How Long Does It Take To Prepare Walt’s Worm Recipe?
Preparation takes about 10 to 15 minutes. Mixing ingredients is quick, and the recipe can be stored or used immediately to feed worms efficiently.
Conclusion
Walt’s Worm Recipe offers a simple way to attract fish. It uses easy ingredients you can find anywhere. The steps are clear and quick to follow. This recipe works well for beginners and experts alike. Try it next time you go fishing.
You might catch more fish than before. Enjoy the process and have fun outdoors. Keep practicing to improve your fishing skills. Walt’s recipe can make your fishing trips better. Give it a try and see the difference yourself.