

Are you ready to enjoy fresh green beans all year long? Water bath canning is a simple, safe way to preserve your harvest and keep your pantry stocked with delicious veggies.
This easy green beans recipe will guide you step-by-step, so you can feel confident in your canning skills. Whether you’re new to canning or looking to perfect your technique, you’ll find everything you need here to make tasty, crisp green beans that stay fresh for months.
Keep reading and discover how you can turn your garden’s bounty into a homemade treat your whole family will love.
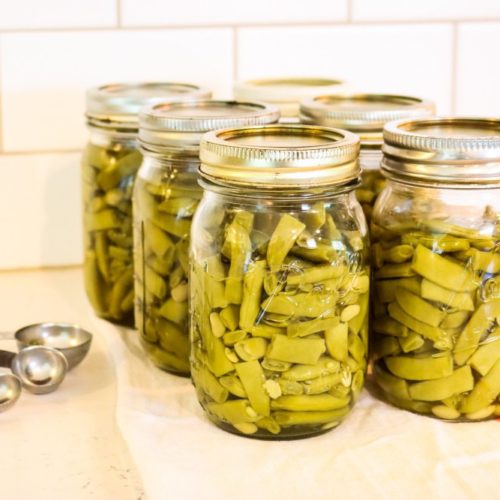
Credit: melissaknorris.com
Choosing Fresh Green Beans
Choosing fresh green beans is the first step in making a tasty water bath canned green beans recipe. Fresh beans keep their color, crunch, and flavor. Using the best beans helps your canned green beans stay delicious for months. It also makes sure they are safe to eat.
Fresh green beans have a bright green color. They feel firm and snap easily when bent. Avoid beans with brown spots or wrinkles. These signs show the beans are old or spoiled.
Picking The Best Beans
Pick green beans that are small to medium in size. Larger beans tend to be tough and stringy. Look for beans with smooth skin and no blemishes. Fresh beans should not be soft or limp. Choose beans that snap crisply when you bend them.
Try to buy green beans from local farmers or markets. They are usually fresher than store-bought ones. If possible, pick beans the same day you plan to can them. This keeps the beans at their best quality.
Preparing Beans For Canning
Wash the green beans under cool running water. Remove any dirt or debris. Snap off the stem ends and any tips. Cut the beans into pieces about 1 to 2 inches long. This size fits well in jars and cooks evenly.
Sort the beans and remove any that look damaged or soft. Blanch the beans by boiling them for a few minutes. Then, plunge them into ice water to stop cooking. Blanching helps keep the beans crisp and bright green.
Essential Equipment
Canning green beans at home is simple with the right tools. Essential equipment helps keep your process safe and effective. It makes preserving fresh green beans easier and more fun. Preparing ahead with proper gear saves time and prevents mistakes.
Water Bath Canner Basics
A water bath canner is a large pot with a lid and a rack inside. It holds jars upright during boiling. This boiling kills bacteria and seals jars tightly. The rack stops jars from touching the pot’s bottom. This prevents cracking and ensures even heat.
Choose a canner that fits your stove size. The lid should seal well to trap steam. A deep canner holds enough water to cover jars by at least one inch. This depth is needed for safe processing.
Jars, Lids, And Tools Needed
Use glass canning jars made for preserving food. These jars resist heat and pressure. Pick the right size, usually pint or quart jars for green beans. New lids are essential for a strong seal. Old lids may not seal properly.
Other helpful tools include a jar lifter, funnel, and bubble remover. The lifter safely moves hot jars. The funnel keeps jar rims clean and prevents spills. The bubble remover removes air pockets inside jars. These tools improve safety and ease during canning.
Preparing The Green Beans
Preparing green beans properly is key for a successful water bath canning process. Fresh, crisp beans ensure the best taste and texture after canning. This section covers how to prepare green beans step by step for safe and tasty preservation.
Washing And Trimming
Start by rinsing the green beans under cold running water. Remove dirt and any bugs carefully. Next, trim the ends of the beans with a sharp knife. Cut off the tough stem side and any brown spots. You can leave the beans whole or cut them into smaller pieces. This makes packing easier and fits jars better.
Blanching Process
Blanching stops enzyme action that can spoil flavor and color. Boil water in a large pot. Add the green beans and boil for 3 minutes. Then, transfer beans quickly to ice water to cool. This process keeps beans crisp and bright green. Drain beans well before packing them into jars for canning.
Making The Brine
Making the brine is a key step in water bath canning green beans. The brine helps preserve the beans and keeps them crisp. It also adds a subtle flavor that enhances the natural taste of the beans. A good brine balances salt and water perfectly.
Salt And Water Ratios
The right salt-to-water ratio is important. Use 1 tablespoon of canning salt for every 2 cups of water. This ratio helps prevent spoilage and keeps the beans fresh. Always use canning or pickling salt, not table salt. Table salt can make the brine cloudy or change the taste.
Boil the salt and water together until the salt dissolves. Let the brine cool before pouring it over the beans. Cool brine prevents the beans from cooking too much during canning.
Optional Seasonings
Seasonings add extra flavor to your green beans. Common choices include garlic cloves, peppercorns, and dill sprigs. You can also add a small piece of onion or a bay leaf. These ingredients make the beans taste fresh and tasty.
Use seasonings sparingly. Too much can overpower the beans’ natural flavor. Place the seasonings directly into the jar before adding beans and brine. This way, the flavors mix well during the canning process.
Packing Jars
Packing jars is a key step in water bath canning green beans. How you pack affects texture and preservation. Two main methods exist: hot pack and raw pack. Each has its own benefits. Choose the one that fits your time and results.
Hot Pack Method
In the hot pack method, green beans cook before packing. Boil or steam beans until slightly tender. This softens them and helps release air. Pack the warm beans tightly into hot jars. Add hot canning liquid to cover beans. Leave proper headspace for expansion. This method reduces floating beans in jars.
Raw Pack Method
The raw pack method uses fresh, uncooked green beans. Fill clean jars with raw beans. Pack tightly but gently to avoid breaking. Pour boiling water or brine over the beans. Keep enough headspace for safe sealing. This method saves time and keeps beans crisp. Some beans may float in jars after processing.
Processing In Water Bath
Processing green beans in a water bath is an important step in canning. This method helps keep your beans fresh and safe for long storage. The process uses hot water to kill bacteria and seal the jars. It is simple and effective for high-acid foods like green beans with added vinegar or lemon juice.
Careful attention to filling the canner and the correct timing and temperature ensures good results. Let’s explore these steps in detail.
Filling The Canner
Fill the canner with enough water to cover the jars by at least one inch. Use warm water to prevent jars from breaking. Place the jars carefully into the canner. Avoid overcrowding, so water flows around each jar. Leave space between jars to allow even heating. Cover the canner with a lid before heating.
Timing And Temperature
Bring the water to a rolling boil before starting your timer. Keep the water boiling during the entire process. Process green beans for the time recommended in your recipe, usually about 10 to 15 minutes. Use a timer to avoid under or over-processing. After processing, turn off the heat but leave jars in the water for a few minutes. This step helps prevent jar breakage. Remove jars carefully and place them on a towel to cool.
Cooling And Storing
After you finish processing the green beans in the water bath canner, the next step is cooling and storing. This step is very important to keep your canned green beans safe and tasty. Proper cooling lets the jars seal correctly. Storing them right helps maintain their flavor and freshness for months.
Jar Sealing Check
Once jars cool for 12 to 24 hours, check the seals. Press the center of each lid. If it does not pop up and down, the jar is sealed.
If a lid moves or pops, the jar did not seal. You can reprocess the jar or refrigerate and use soon. Proper sealing stops air and bacteria from spoiling your green beans.
Storage Tips
Store sealed jars in a cool, dark, and dry place. Avoid direct sunlight and heat sources. These can reduce the quality of the canned green beans.
Label jars with the date. Use older jars first. Properly canned green beans last up to one year. Check jars for any signs of spoilage before use.
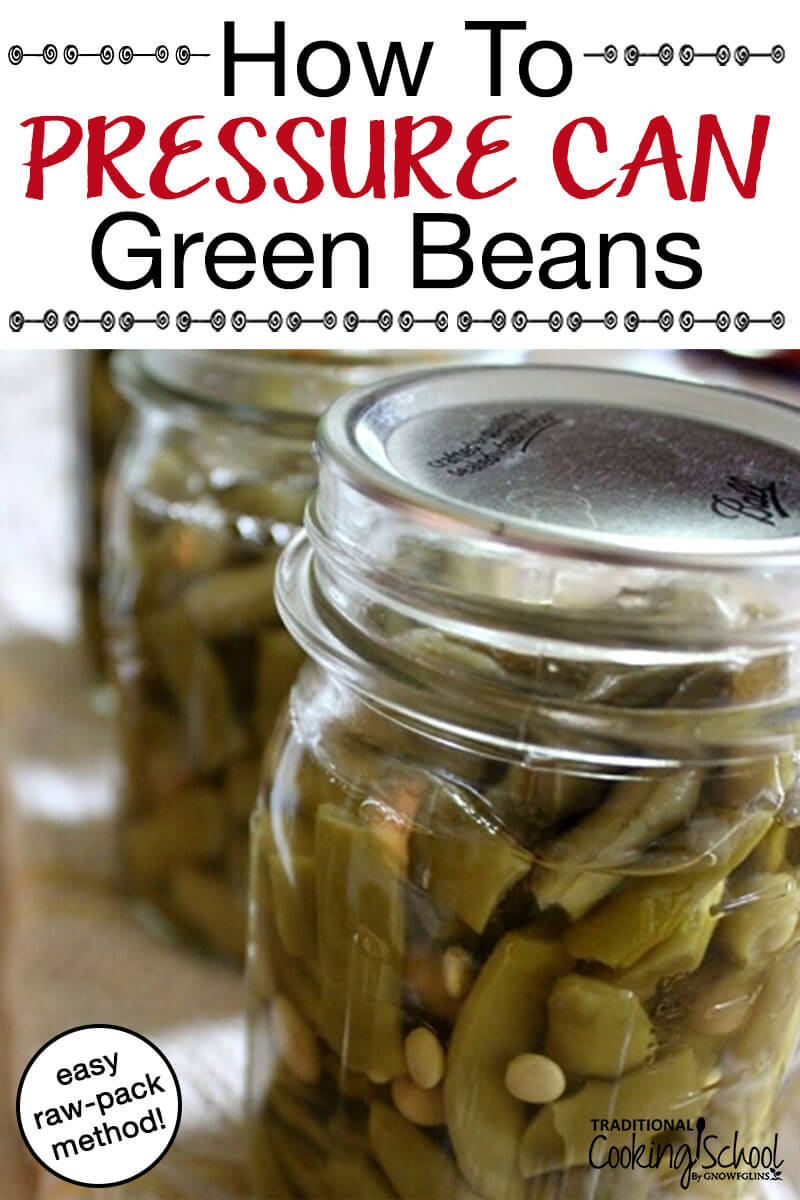
Credit: traditionalcookingschool.com
Troubleshooting Common Issues
Troubleshooting common issues in water bath canning green beans helps keep your jars safe and tasty. Small mistakes can cause seal problems or affect the beans’ texture. This guide covers common problems and how to fix them. Follow these tips for better results.
Seal Failures
Seal failures happen when jars do not close tightly. This can let air in and spoil the food. Check jar rims for cracks or chips before use. Always clean jar rims well to remove food bits. Use new lids every time for a strong seal. Tighten bands just until fingertip tight. Over-tightening stops air from escaping during processing. Let jars cool undisturbed for 12 to 24 hours. After cooling, test seals by pressing the lid center. If it pops up, the jar did not seal. Reprocess or refrigerate these jars and use soon.
Texture And Flavor Problems
Green beans can turn mushy or lose flavor if not canned right. Overcooking before packing or too long in the bath softens beans. Under-processing may leave beans tough and unsafe. Use fresh, firm green beans for best texture. Blanch beans in boiling water for 3 minutes before canning. Add salt to jars for flavor, but avoid extra liquid. Store canned beans in a cool, dark place. Heat or light can dull flavor and color. Check your recipe timing and water bath temperature carefully.
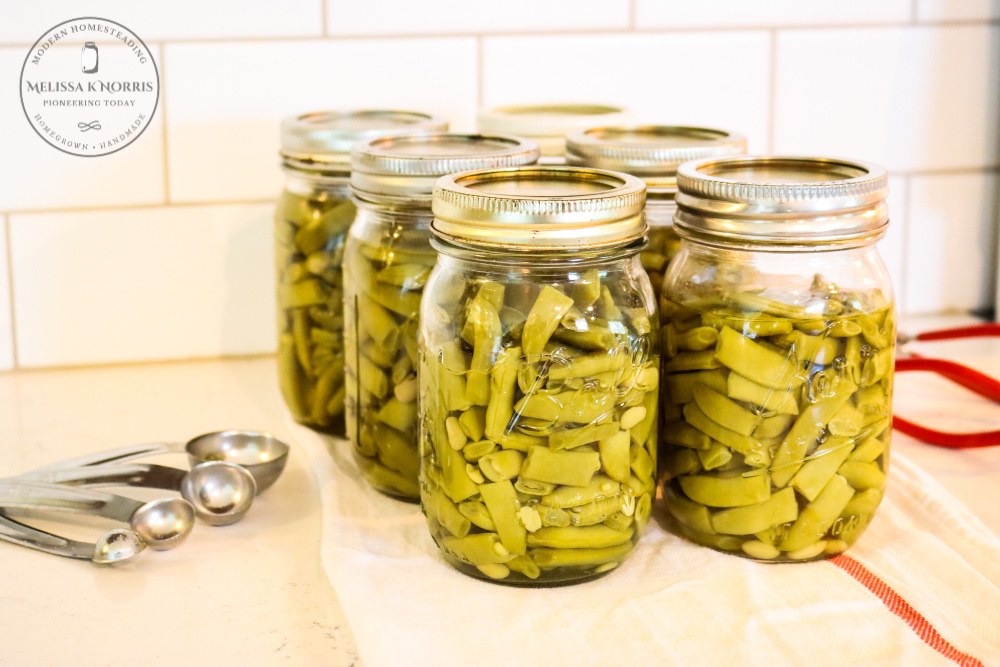
Credit: melissaknorris.com
Frequently Asked Questions
How Long To Water Bath Can Green Beans Safely?
Water bath canning green beans requires 35 minutes of processing time. This ensures the beans are preserved safely at home. Processing times vary by jar size and altitude, so always follow tested guidelines for best results.
What Equipment Is Needed For Water Bath Canning Green Beans?
You need a water bath canner, mason jars, lids, a jar lifter, and a funnel. These tools help safely process and seal the green beans for long-term storage.
Can I Use Fresh Or Frozen Green Beans For Canning?
Always use fresh, firm green beans for canning. Frozen beans are not recommended because freezing breaks down their texture, affecting safety and quality during the canning process.
Why Add Salt When Water Bath Canning Green Beans?
Salt enhances flavor but does not preserve green beans during canning. It is optional and typically added at about 1 teaspoon per quart jar for taste.
Conclusion
Water bath canning green beans keeps them fresh for months. This method is safe and easy to do at home. You only need simple ingredients and basic tools. Enjoy your green beans all year long. Homemade canned green beans taste fresh and natural.
Try this recipe to save money and reduce waste. Preserve the harvest and share with family. Canning green beans is a rewarding kitchen skill. Give it a try and enjoy the results!